Setting up your signature in Outlook
The first steps to creating a signature is to open Outlook and click on ‘New Message’. Once you are in the new message window, on the top taskbar go ahead and click on signature. You will see a drop down menu that has all your previously saved signatures, if you haven’t created one it will be blank but underneath you’ll click on ‘Signature’.

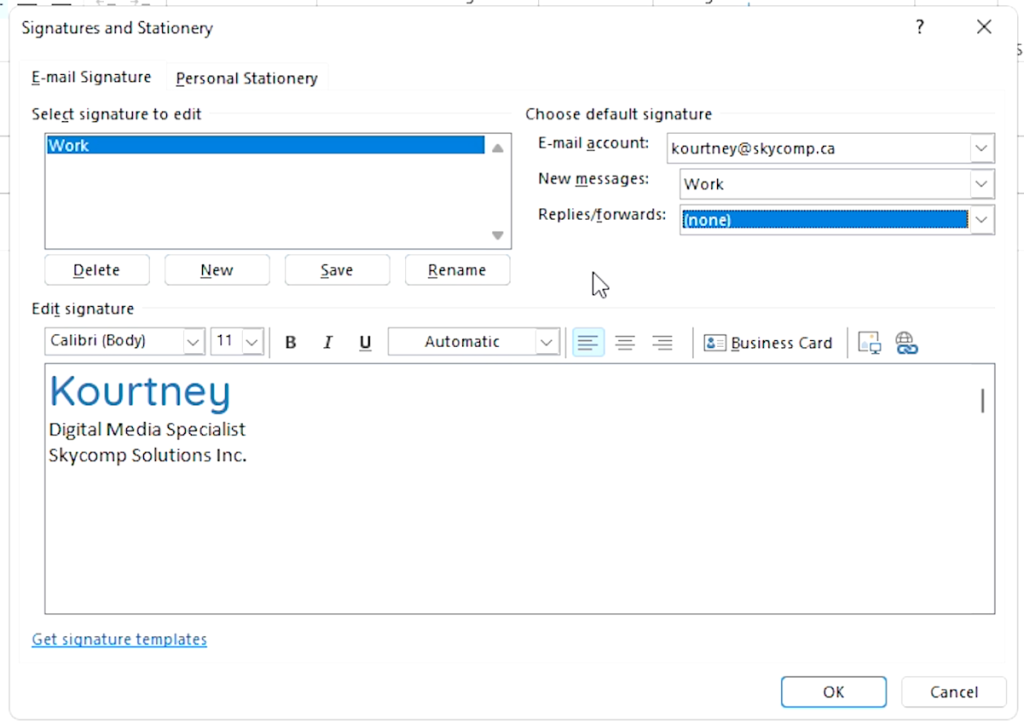
This is what the email signature creation box will look like:
First thing is to choose the email account you want connected to the signature, then click create new and give the email signature a name.
Once you have done that you can go ahead and add that signature to the new message and reply/forwards menu on the right.
Creating a basic signature
now that you have completed that step above, add in the information you want on the signature like your name, job title, company name, address etc.
After you have added in your info this is where you can start customizing. You have the ability to change the font, font size, colour, allignment, insert photos, hyperlink and you even have the option to add your business card.
Here is our example of the basic signature.

Advanced Email Signature Editing
Now that you understand the basics of creating an email signature let’s go over some things you can add to make your signature stand out!
The signature creation box is great but if you want more creative control i suggest building it in the email body itself then copy and paste it into the signature box.
Adding Headshot
When in the email body go into the insert tab and add a 2×1 table. On the right hand side of the table paste you basic signature.
Now on the the left hand side insert the photo you want in the email signature. Once your photo is inserted if you hover over the middle line of the table you will be able to drag it left or right to leave as much space as you desire between the photo and the text.
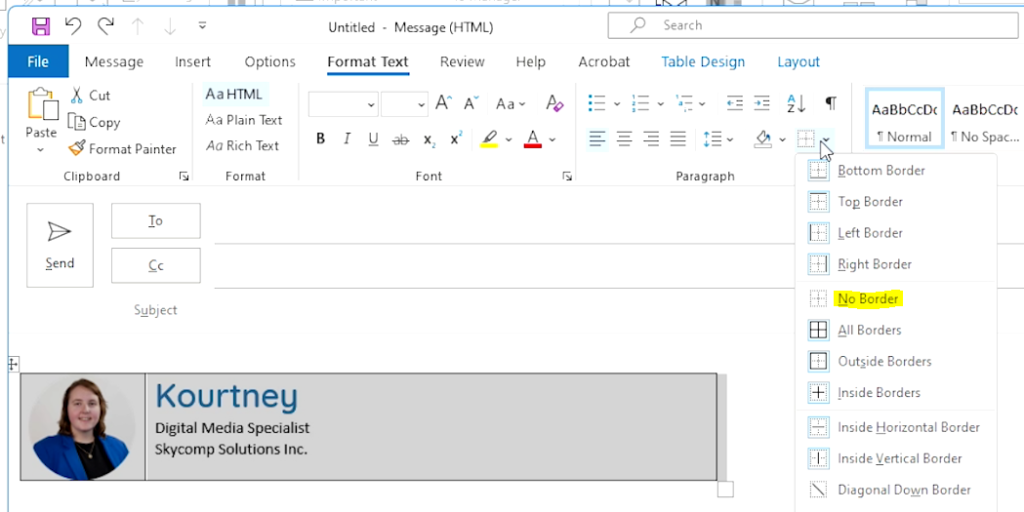
It should now look something like this:
To delete the box border around your signature make sure you highlight it, go to ‘format text’ on the top taskbar and in the paragraph table and hot the dropdown menu you on the square box and click on ‘No Border’. This will hide the black lines around your signature.

Linking social profiles
Put the curser where you want you social icons to go. Head over to insert and add the photos, you can resize them to your desire. Once you have all your social icons added and placed where you want them, highlight your the entire signature you just created and cut it is using the keyboard shortcut crtl x.
Open the signature dialog box we were using for the basic signature and paste your new and improved one in its place.
To link your social profiles click on the desired social icon and then the hyperlink tab. This will add another pop up window.
Just copy and paste the link into the address line and you are good to go!
This was an introduction to creating email signature in outlook, take some time and mess around with the settings to create your own personalized signature. Outlook also offers free email signature templates if you don’t want to start from scratch!